

Graphic guide to invoices in acquisition
An invoice can be created and linked directly to an order on the Acquisition tab in the Orders subtab. Here we select the order to which we want to assign the invoice and click the Order administration button. A window with an overview of the selected order opens, where in the top left part, in the Invoices section, we click the green plus to create a new invoice.
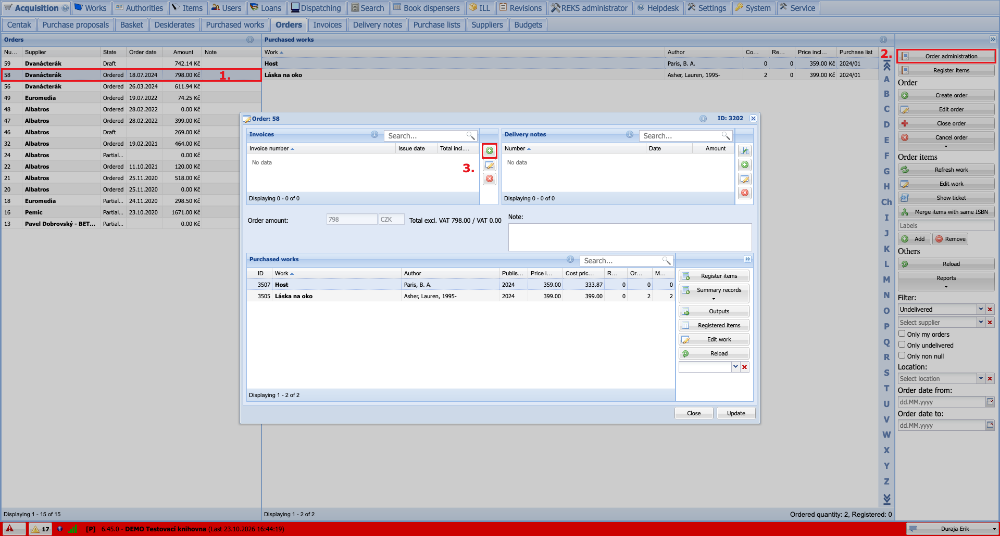
(fig. 1)
A window with the invoice now appears. In the bottom left part, all the purchased works that were in the order are displayed automatically, together with the number of ordered items and their price. We then fill in the mandatory fields with the invoice information in the top left part of the window. In the bottom right part we can also add the amount for the non-library items of the invoice. When we are done, we click the Create button (or directly Create and close).
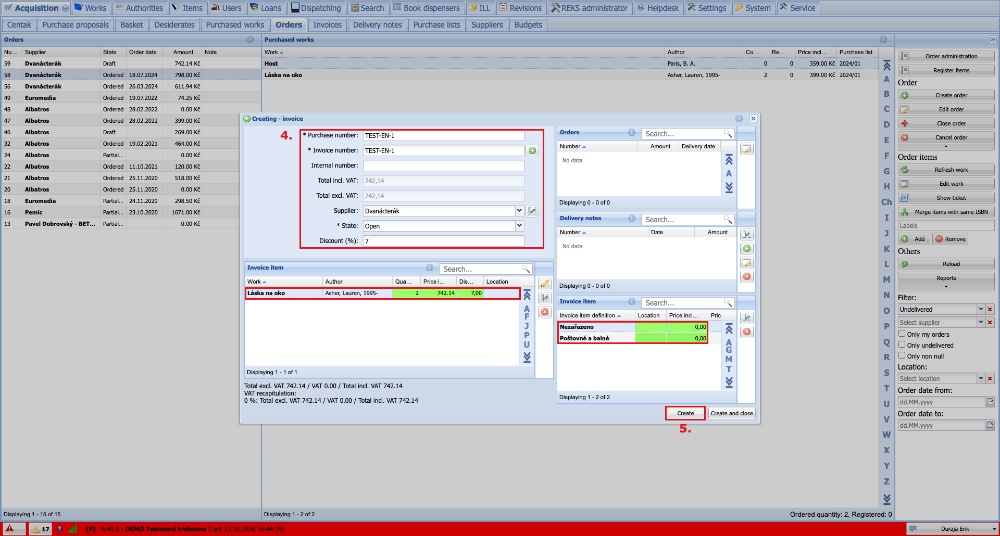
(fig. 2)
After the invoice is saved, the linked order is displayed in the top right part of the window. In the last step we close the invoice with the cross in the top right corner.
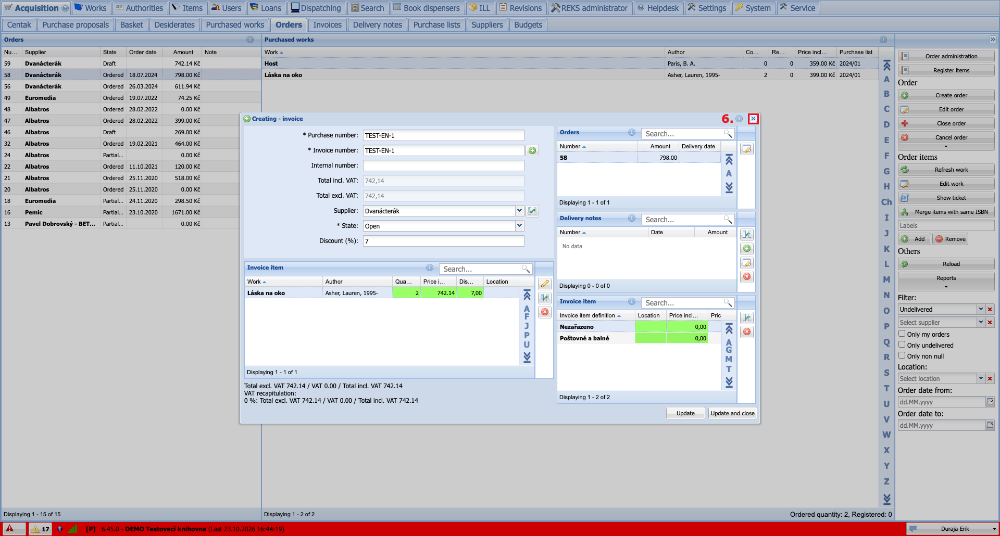
(fig. 3)
Individual purchased items can also be assigned to an invoice manually. This can be useful, for example, if a supplier sends us one invoice for several different orders. On the Acquisition tab in the Invoices subtab we select the invoice to which we want to add purchased items and open it by clicking the Update button (if our invoice does not exist yet, we can create it here first). Then we click the Select button to the right of the library items of the invoice.
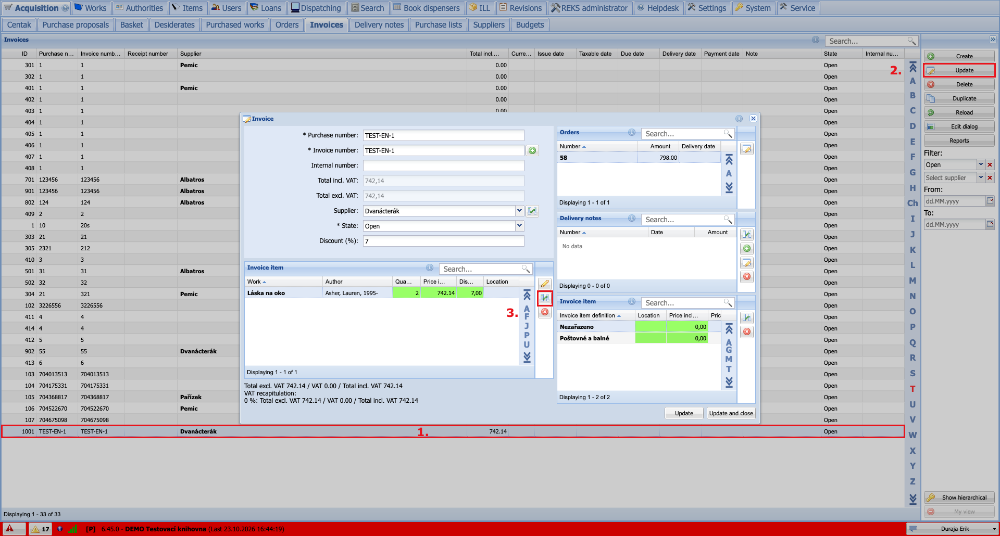
(fig. 4)
A window then opens showing the works ordered from the supplier selected on the invoice. We mark the work that we want to add to the invoice and click the Select button.
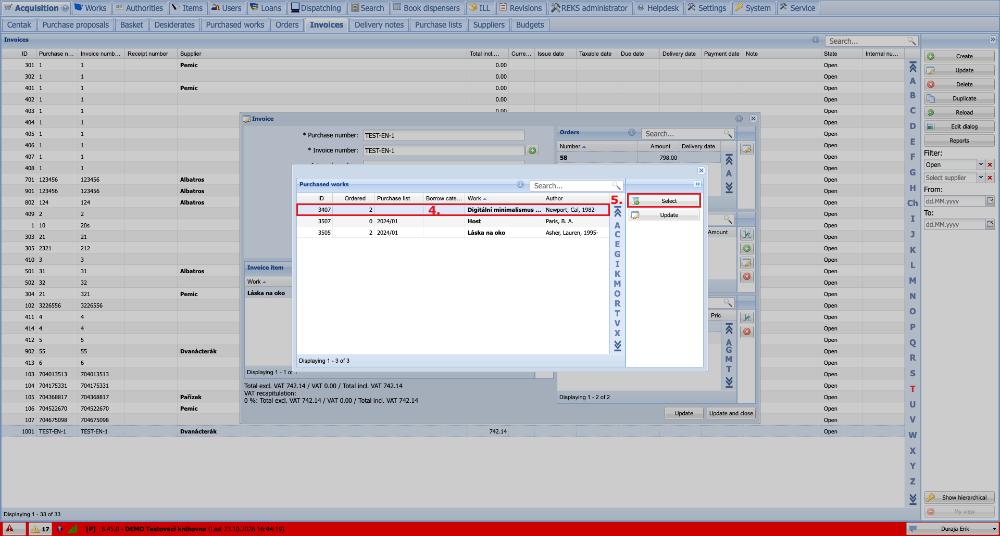
(fig. 5)
The selected work is displayed in the list of library items of the invoice. When we have added all the works, we click the Update button (or directly Update and close). Based on the selected purchased items, the invoice is automatically linked to the orders in which these works are found. We can see these orders in the top right part of the window. Finally we close the invoice with the cross in the top right corner.
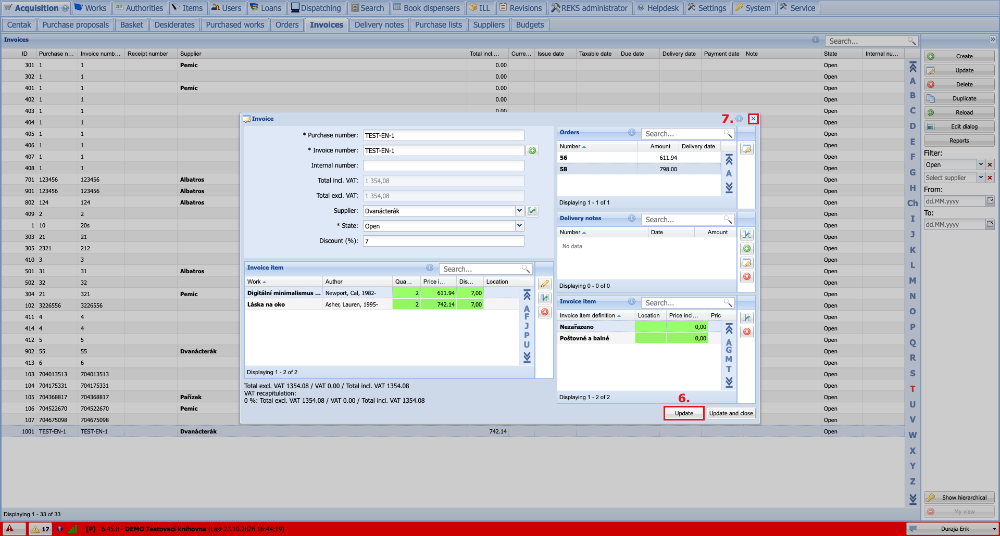
(fig. 6)