

Graphic guide to creating a revision
We can set up a revision ourselves on the Revisions tab, where we click the Create button.
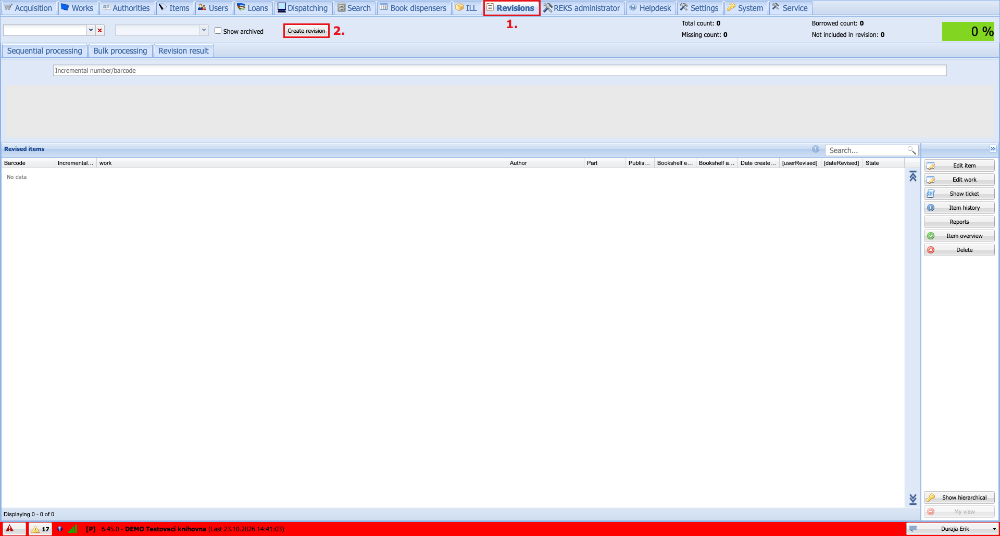
(fig. 1)
In the new window we fill in the name of the revision, and we can also enter the place, a custom text, the names of the people who carried out the revision, and the number of years since the last lending or the age of the document. Then, using the green arrows, we select which work types and which locations we want to revise (if you want the revision results divided by location, the revision needs to be set up for each location separately). Let us consider, for example, revising the work type Periodicals. From a time perspective it is a short-term document, which is not normally revised. Finally we click the Save button, which creates the revision. With a larger number of items, generating the revision may take a longer time.
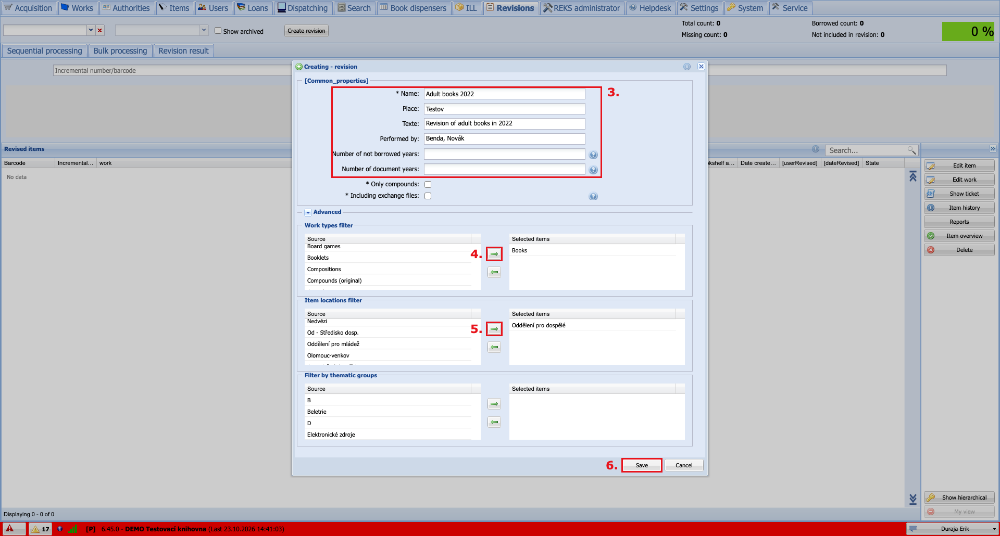
(fig. 2)
The revision settings also offer advanced options for specifying the revised items more closely. If we click the button next to the Advanced text, filters with additional setting options are displayed. We then expand the required filter via the magnifying glass icon.
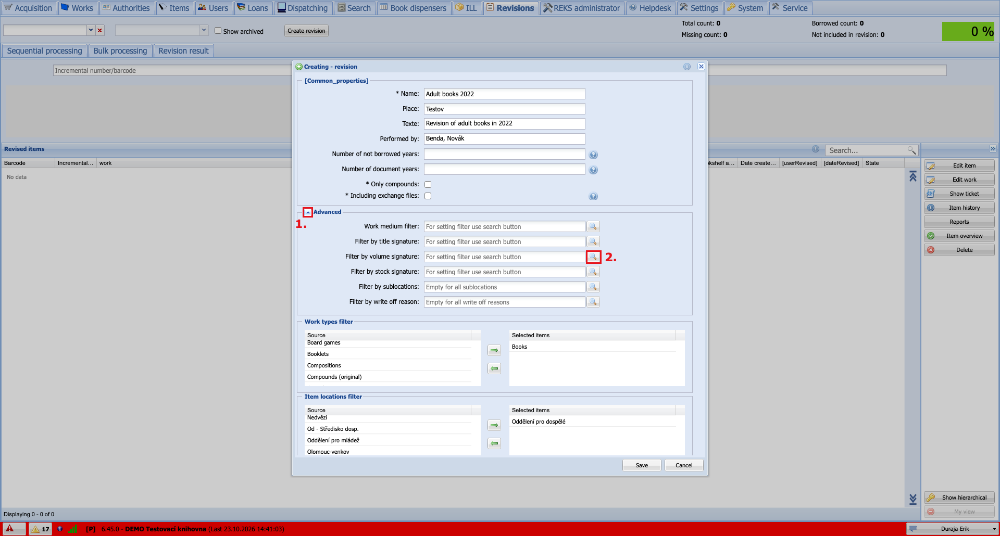
(fig. 3)
In the window that appears we then set the filter parameters. For example, we want the revision not to contain items whose shelf mark begins with PK or ST. When we have the setting done, we close the filter by clicking Update.
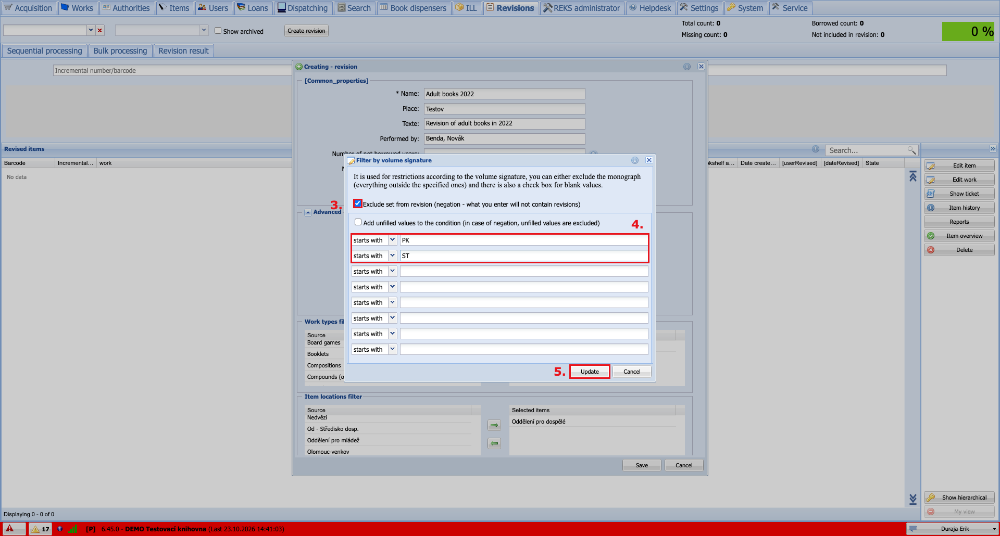
(fig. 4)